10 Tips for Shooting With HDSLR
The first SLR that enabled video recording was launched several years ago. Since then, both the sales of these cameras and the production of independent films has undergone a real revolution, partly due to the possibilities that these new tools have been offering. However, many users are still facing difficulties when trying to manage this kind of cameras.
Let’s take a look at 10 tips that make video recording with SLR much easier.
1. Manual mode. The first thing we should do if we want to achieve high quality results is to put all possible camera settings on the manual mode. Put the upper dial mode on M (manual), and do the same with the tab focus of the lens, as well as exposure compensation and other adjustments that can be found in the menu. Remember that some cameras such as Canon have also options like “Peripheral Illumination Correction” or “Highlight Optimizer” that should also be turned off if we don’t want to face unpleasant surprises. This will ensure full control over your images and help avoid unwanted effects.
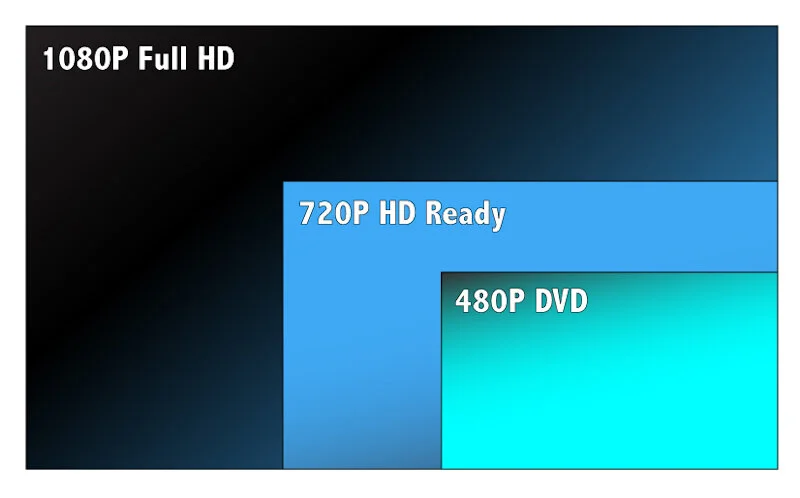
2. Format. Most cameras offer two different resolutions – 1920 × 1080 (also known as Full HD) and 1270 x 720. The latter often provides the option of 50 p, which means recording 50 frames per second, unlike the first one that takes only 25. The first is used in most situations while the second one becomes necessary for taking extra frames which offer the possibility of creating slow motions.
It is also important to use the PAL video system. That is what determines whether the video will have 25 or 50 frames per second. When choosing the NTSC we’ll have 30 or 60 fps. The first is the European format and the second American, which is also used in Japan.
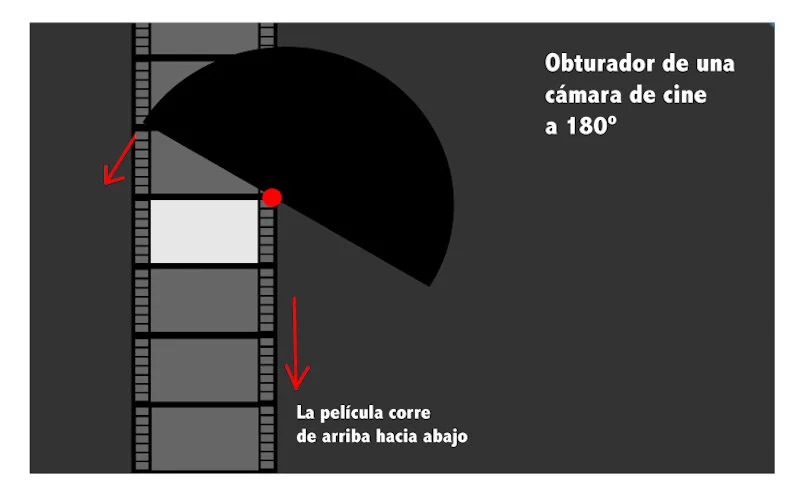
3. Diaphragm and shutter. As a photographer, you’re probably used to shooting at any shutter speed from 1/2000 to 30s. When working with video, we continue to use the chosen diaphragm, but the shutter speed is always marked by the number of recorded frames per second (fps). This sets strong limits and it becomes essential to use ND filters to adjust the exposure. But let’s dig deeper. If, as noted above, we are recording at 25 fps, the shutter has to act at least once per frame which means 25 actions. Thus, technically the minimum shutter speed we could select is 1/25. You should try not to use that speed unless you are seriously lacking light. Why? Because in order to get the cinematic look that we are used to, the shutter of your camera should work 180° in film equivalent. What does this mean? The shutter works horizontally to the axis of the image, as do our eyelids. Therefore, it looks more cinematic and natural.
And how do I calculate to get the necessary 180 º? It’s quite simple – apply the following formula. E = F x 360/180, where “E” is the action and “F” fps. Therefore, if we are recording at 25 fps, it needs to be multiplied 25 x 360 and divided by 180. The result is 50 – which gives us the shutter speed of 1/50 of a second. If numbers are not your thing or you don’t want to calculate, remember that these setups are the most common ones:
25fps = 1 / 50
50fps = 1 / 100
30fps = 1 / 60
60fps = 1 / 120
24fps = 1 / 48
4. Focus accurately. One of the great advantages that the DSLR has is the lens focus which allows you to zoom up to x10, providing better control over the focus. This is essential because, as I said before, we are working with manual focus. When they launched the first DSLR that enabled recording videos, people were complaining about the autofocus that wasn’t functioning properly, and following the continuous movement was even worse. Now users are more and more convinced that the autofocus is not necessary. Have you seen a TV operator using the autofocus? Have you seen a movie camera that has it? That is because the systems of autofocus are unreliable. The best approach is to zoom with the lens, adjust the focus to the desired point and if necessary, make several measurements and then do the follow-up.
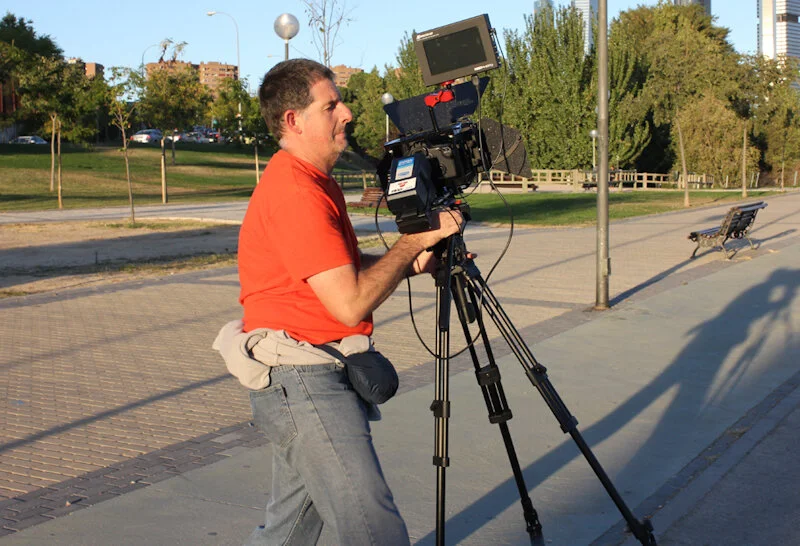
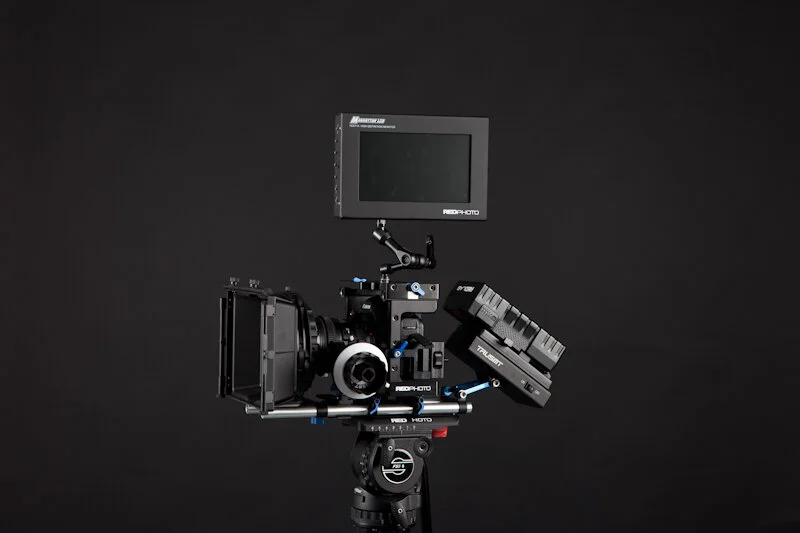
5. Use a tripod whenever possible. Due to its small size and weight compared to a regular video camera, the DSLR is unstable when using it without a tripod or a stabilizer. That could be considered its biggest drawback. These cameras are designed for photography, so they don’t have the suitable shape or ergonomics for shooting a video. Therefore, I strongly recommend using a good tripod, preferably ones that are designed for video making, provide proper stability and enable you to move the camera freely.
The tripod is undoubtedly an irreplaceable companion to every cinematographer. There are, of course, many other accessories, stabilizers, sliders, cranes, etc. But let’s start with the basics and move on from there.
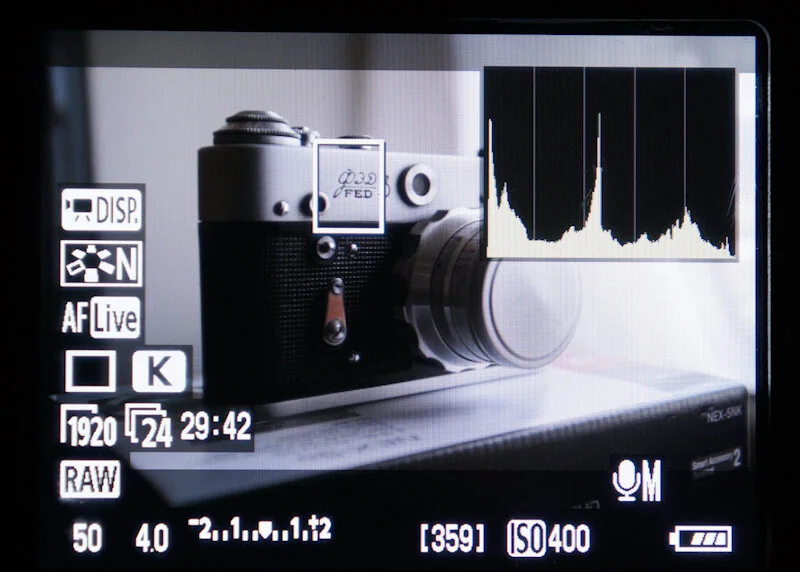
6. Expose accurately. When it comes to shooting a video, you should pay extra attention to exposure. Unlike in photography, where we usually work in RAW and have enough possibilities for making corrections in editing, video mode limits the possibilities. The final image of a video that’s encoded in H264 format, as JPG format in picture taking, does not allow making a lot of corrections before the degradation appears. So, the right exposure is essential.
This means ignoring the image on our screens and even the light meter. Trusting our exposure to a correct reading of the histogram, which has to show that all information in our scene lies within the dynamic range of the camera is the key to correct exposure.
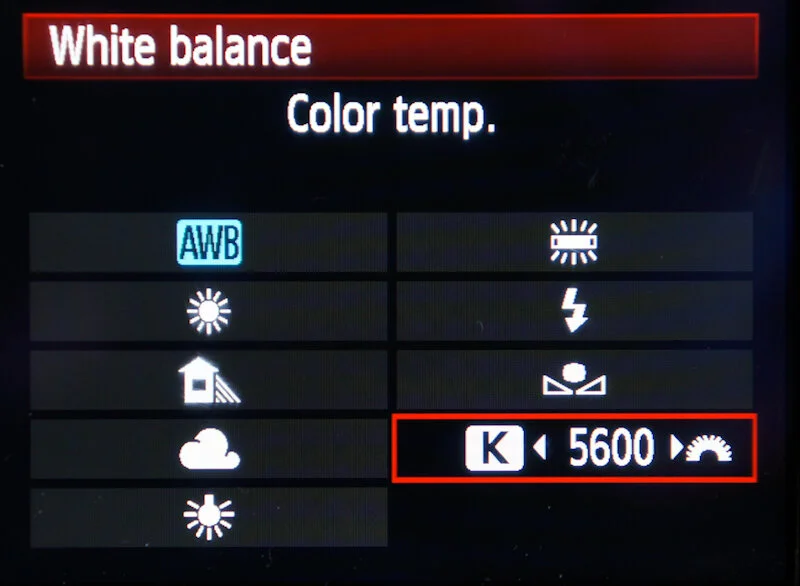
7. White balance. While taking photos, it’s not necessary to pay too much attention to these settings as it can easily be changed afterwards when shooting in RAW. It is the opposite with video – the adjustment of white balance should be as accurate as possible to prevent making corrections in post-production with consequent degradation of the image.
The best way to adjust the color temperature of our scene is by choosing exactly the right number of Kelvin degrees. Some cameras allow changes in steps of 100 degrees Kelvin. Remember that daylight is balanced at 5.600K while tungsten does it at 3200k. Fluorescent light that’s misleadingly called daylight, does it around 4.000k 4.500k.
8. Sensitivity setting (ISO). The ISO is the unit that’s used to measure the light sensitivity of our camera. The higher the selected ISO is, the greater the sensitivity of the sensor to the luminance of the scene. Therefore, the lower the light, the higher the ISO needed. However, when we increase the ISO, it also increases the so-called image noise, especially in the shadows, significantly degrading the quality of our image. So try to keep the ISO as low as possible, seeking compromise between sensitivity and noise. It is important to know how our camera responds to the noise – cameras with higher size of the sensor and advanced electronics have greater sensitivity and produce less noise. When it comes to cameras with APS-C sensors the highest suitable sensitivity would be 800 ISO, while with the so called Full Frame the acceptable noise level is 1600 ISO.
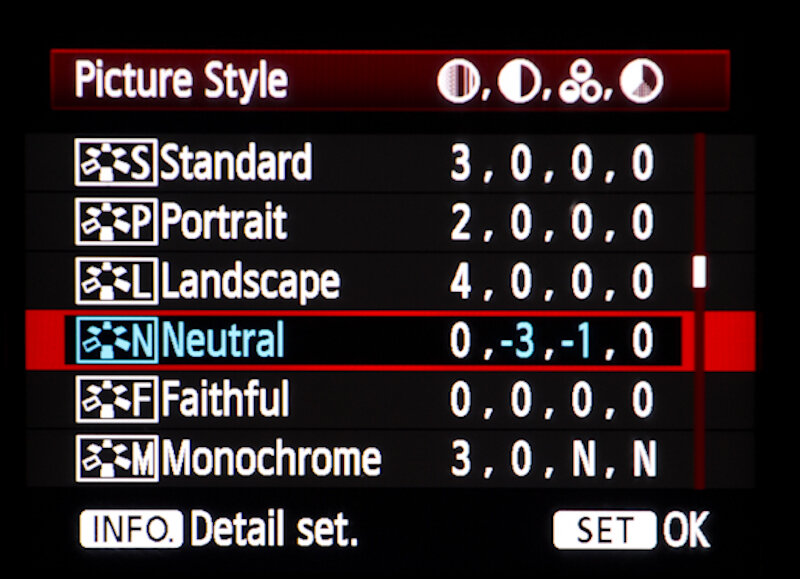
9. Choosing the right profile. Once we understand that our DSLR does not record video in RAW, setting the proper recording profile becomes essential. Our DSLR comes with several pre-recorded image profiles that often have names like “neutral”, “landscape”, “portrait”, “monochrome”, and so on. We choose the one that offers us the greatest dynamic range which is usually called “portrait” or “neutral”. This profile will not lose details in the shadows while also not clipping the highlights.
However, if you want to go a step further, I recommend using profiles designed for brands such as Technicolor, with Cinestyle profile or the great profiles by Marvels.
10. Watch and practice. I think this is the most obvious advice, as well as the most useful of all those previously listed. Learning any technique inevitably involves relentless practicing. It is estimated that a human being needs about 2,000 hours of practice to attain a new technique, whether it’s photography, video or cooking. Of course, some things take longer than others.
Get out there and shoot what you like, but do not forget to keep an eye on the work of others which is a great source of inspiration. It gives you an opportunity to learn from them, improve your technique, style and most importantly, your ideas and experience.