About Aurora Borealis
In more than ten years as a professional photographer, I’ve had the opportunity to contemplate and photograph lots of different scenes and breathtakingly beautiful places. In my images, I always try to not only show the beauty of the landscape, but to transmit the emotion I felt while shooting as well.
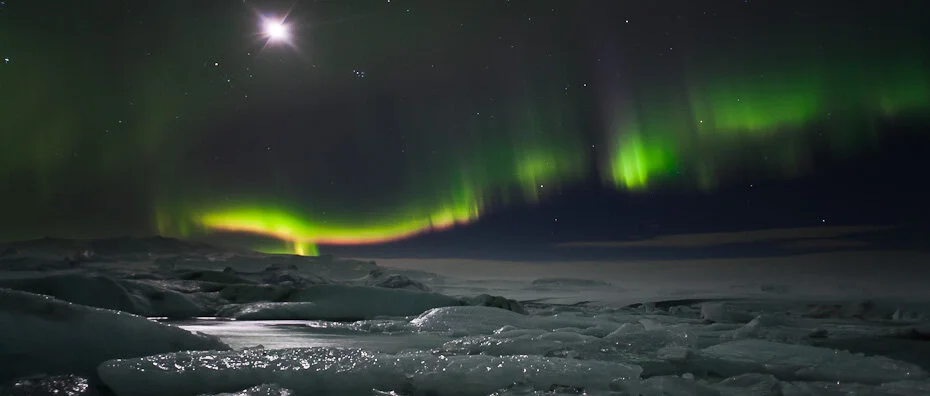
Aurora Borealis are a natural phenomena that move and touch the spectator as no other scenery. I have seen the Northern Lights countless times over the years, yet I still experience them just like the first time: with childlike wonder, fascination and euphoria.
Aurora Borealis awake lots of questions in the photographer and traveller. I’m not an astronomy expert, but I’ll try to share what I have learned while hunting and capturing Auroras.
How do Aurora Borealis happen?
Auroras are a natural light phenomena that can be seen on the Earth Poles. The North Pole ones are called Aurora Borealis or Northern Lights, and the ones in the South Pole are known as Aurora Australis or Southern Lights. They appear as a result of a particle collision between the solar wind and Earth’s magnetic fields.
Where can Aurora Borealis be seen?
Aurora Borealis become more visible the closer we get to the Earth Poles. As the Antarctica is an underpopulated place, very difficult to access, most of the pictures of Aurora Borealis we see have been taken not in Antarctica, but as close as possible to the North Pole.
In some cases, Aurora Borealis have been seen on lower latitudes, in places like the United Kingdom. However, without a doubt the best places to see them are Alaska, Norway and of course, Iceland. Iceland is considered the most comfortable country to see the Northern Lights, for its more welcoming and relatively mild climate. Thanks to the proximity to the Gulf Stream, in Iceland we can see Aurora Borealis at -10ºC, compared to -25ºC (or lower) for the same conditions in Norway or Alaska.
When is the best date to see Aurora Borealis?
Aurora Borealis might be visible at any time of the year, as long as the sky is dark enough. Contrary to what people think, there is not a time of the year when they are more frequent. The crucial factor is the light. Close to the Arctic the sun doesn’t go down in summer, which means that during the summer months of the year the northernmost countries don’t see the night. This, consequently, prevents the visibility of the Northern Lights. When the night falls, the Auroras appear. When planning an Aurora hunting trip, I usually choose November and March, because these are months with lots of night hours but not as cold as December or January. Additionally, the winter months have much less light hours, and that makes planning the trip additionally difficult.
Can Aurora Borealis be predicted?
There are internet pages that predict the appearance of Aurora Borealis with accuracy. The sun wind creating the Auroras takes two days to reach Earth from the Sun. As the Sun is observed and analyzed constantly by astronomers, when a sun storm or an explosion happens, it’s possible to know that two days after, there will be a lot of Aurora Borealis activity.
The website I use is the Geophysical Institute, Alaska University.
How can we photograph Aurora Borealis?
Aurora Borealis appear in very low light conditions. That will definitely put our photography equipment to the test, and we’ll need the best equipment we can afford. That is to say: low light lenses and sensitive cameras with a low noise level. Besides, Aurora Borealis move quite fast, so we can’t use long exposures or we won’t capture them with enough definition, and that definition is essential in achieving a stunning image. The ideal picture should show an Aurora with defined limits.

I know many of you are expecting the proper Exif data, so I’m going to share what works in most cases, but remember, the best you can do is to evaluate the scene and adapt to it.
ISO: The higher your camera allows for an acceptable level, in my case with a Sony a99 I can go up to 3200ISO with a reasonable noise level, easily rectifiable with Lightroom.
Fstop: The faster that your lens permit, keeping in mind the definition loss with high diaphragm aperture. There are lenses that open 1.4, like the Canon 24mm, but loosing a lot of quality, best results at f2. I use Zeiss 16-35mm f2.8, that offers a great quality even with the highest aperture.
Shutter Speed: This depends on the brightness the Aurora Borealis that we are photographing. In some cases, I had to use only 5s of exposition, when the usual is between 15 and 20s. We will always have to bear in mind that if we use very long exposures the Aurora will look blurry and soft, with no definition, and we are also have the risk of showing moved stars in our picture.