Developing Time-Lapse
The topic on which I get the most questions is the processing of time-lapses, the technical part of it. Most users clearly understand the general concept, which is based on taking still photographs which are then merged at 24, 25 or 30fps to get a moving picture. Still, how exactly the process goes, and what kind of software is best to use, continue to arise questions for the beginners in the time-lapse technique.
The aim of this article is no other than to reveal the keys of this process. However, first I have to clarify that there are several ways to process time-lapses. There are many different programs and workflows, and I’ll explain the one that works best for me. I use RAW files, Adobe Lightroom and Apple Quicktime Pro, which work both for Mac and Windows.
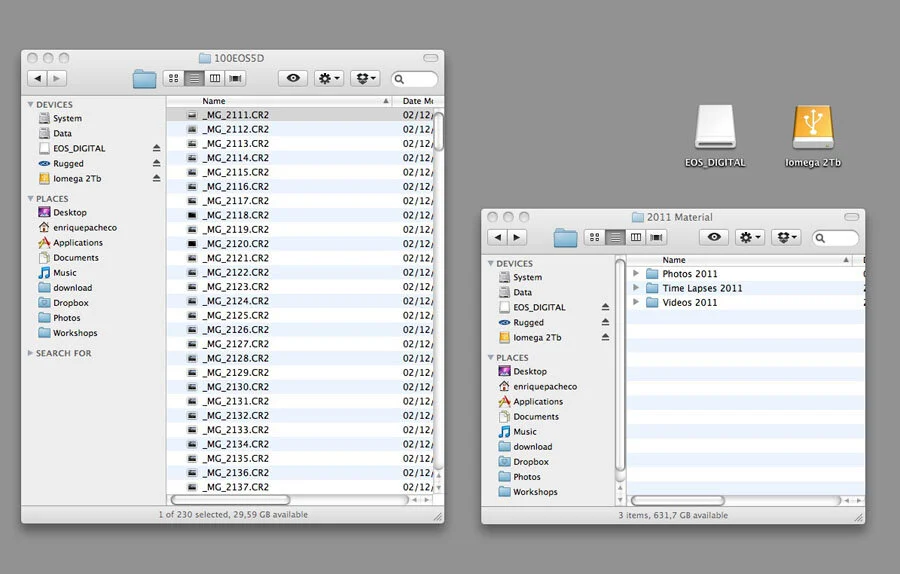
Copying files. The first step is the most simple one: copying the material from the memory card to your hard drive. I prefer to do this using the computer’s operating system and not through the import option of Lightroom. I like to organize the material into folders that are appropriately named including the dates etc. This helps to maintain order in the database, so that you can later find the folders easily.
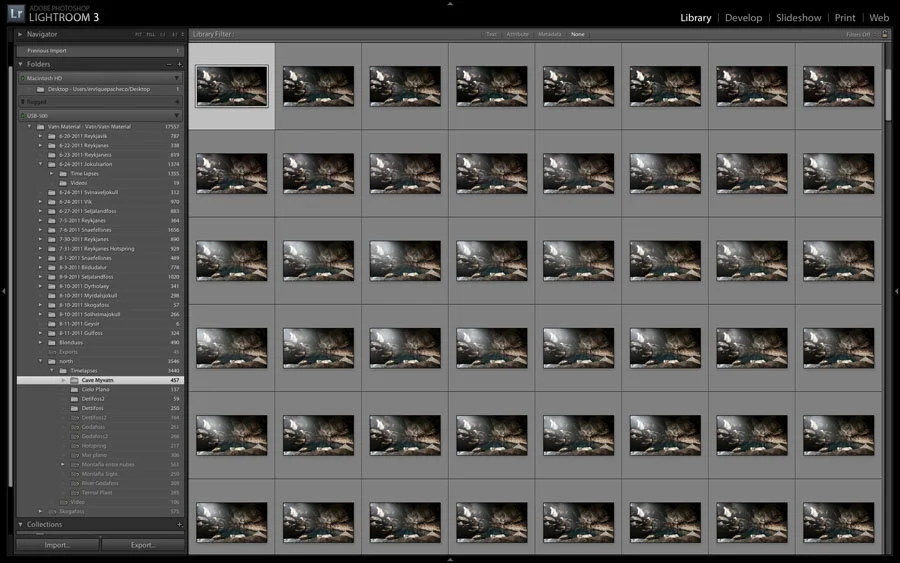
Importing to library. One of the biggest advantages of Lightroom (compared to other editing software) is the possibility of working with catalogs and libraries, thus it is possible to navigate through our pictures as collections, tags, favorites, etc.
I usually drag the folder with the time-lapse photos where the Lightroom logo is, which then opens the import menu. You can also open the program, then click on the File menu and from there choose Import. So you then have the folder and its files available in the Lightroom Library tab.
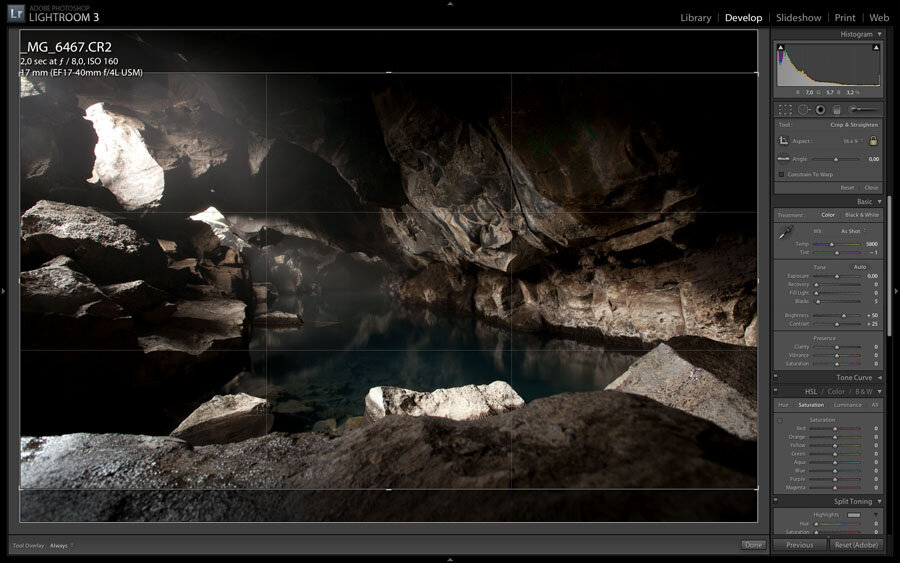
Developing the files. Now it’s time to develop the photos. When shooting in RAW, you have greater control over the images, as the RAW format is uncompressed and enables high quality and much more control over the colors. Select the first take and perform any necessary adjustments before the next step. Let’s see what are the basic settings.
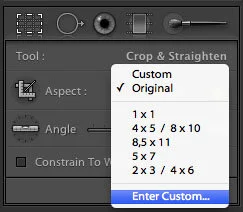
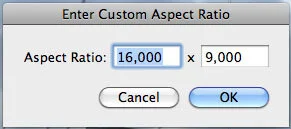
Aspect ratio: I like to start by editing the aspect ratio. Usually our pictures have format of 2/3 or 4/3, depending on the sensor of the camera. But as our goal is to make a video, we need to convert it to 16/9, as this is the standard format of most of the distribution channels. Select the crop tool and insert the new aspect ratio manually. Insert 16:9 and from this moment it will be recorded as “preset” and can be used in the next steps. As you can see in the cropping box on our photograph it now has ratio of 16/9.
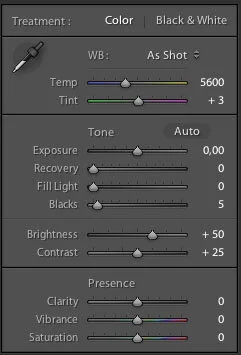
Levels: The following adjustments we should pay attention to are levels, exposure, shadows, contrast, saturation, noise, etc.. Going through the process as we normally do with our pictures, thanks to the versatility of working with RAW. Finally, we adjust the sharpness of the image.
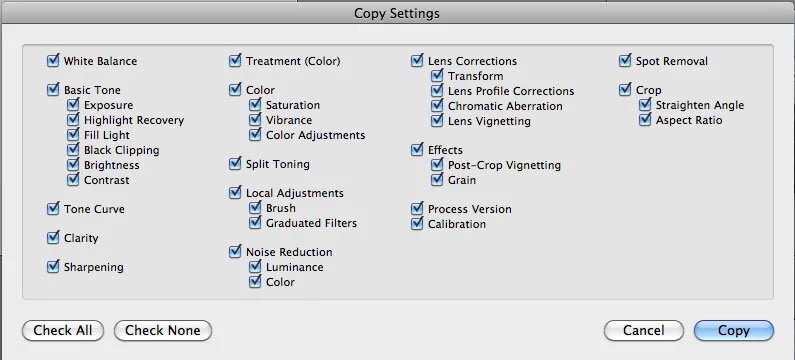
Batch processing: This is perhaps the most interesting part of developing the time-lapse. Apply the same settings you used with the first picture to all your photos. To do this, return to the Library tab, select the first shot, and go to the photo menu, developing settings and click on “Copy Settings”. You can also use the command “ctrl + shift + c” for Windows and “shift + cmd + c” for Mac.
This will open a popup window where you can select the settings you want to copy. I usually select all.
The next step is to select all photos, for that you can use “ctrl + a”. When they are all selected, it is time to apply the settings of the first picture. For that you just have to press “shift + ctrl + v” or “shift + cmd + v”. Immediately all the shots begin to take the appearance of the first one, but do not panic: we are working on raw, so it’s just a metadata change. You can always return to the original image without any loss.
Exporting to jpg or tiff: After that it’s time to export to jpg or tiff in order to make it possible to open it in a video editing program. If we want the highest quality possible and disk space is not a problem, it is better to do a tiffs sequence. However, in most cases a jpg at 100% quality will be more than enough.
After selecting the images, click on the export tab in the lower left corner of the library. This will open a pop-up window where you can choose the format, size, quality and other parameters such as focus and name.
I highly recommend you to create a “preset” with the most commonly used settings, so that you won’t have to insert the settings to each file you are editing.
In the following picture you can see the one I use most frequently.
The exporting process can take a long time and to convert 300 RAW images to jpg or tiff is not a joke. But the advantage of Lightroom is that we can continue working on other files while exporting. That’s real multitasking!

Turning photos into videos. Some might think that we are continuing from where we were, with lots of still images to be converted into a motion video. And it’s partly true, but the difference is that now we have these images correctly retouched and resized to the size and ratio of the final video.
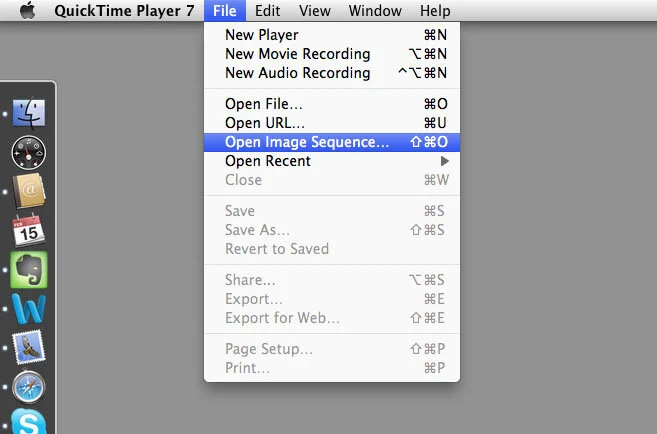
The next step is to merge them into a video clip. For doing that we use Quicktime Pro, as it is very quick and easy. Please note that it must be version 7 or version X, or the player will not work.
Open the application, select “Open Image Sequence” and look for the folder where you have the pictures in jpg. Choose the first one, then select the frame rate of the clip. It is important to choose 25fps if you are in Europe, 30fps if you are in USA or Japan, and 24fps if the video is being made for the big screen.
Then hit ok, and a few seconds later, you have your image sequence done.

Exporting the video. I guess you noticed that I ended up saying that you have a sequence of images, not a video file. That is because until you export the video with a certain codec, you just have a sequence of jpg images.
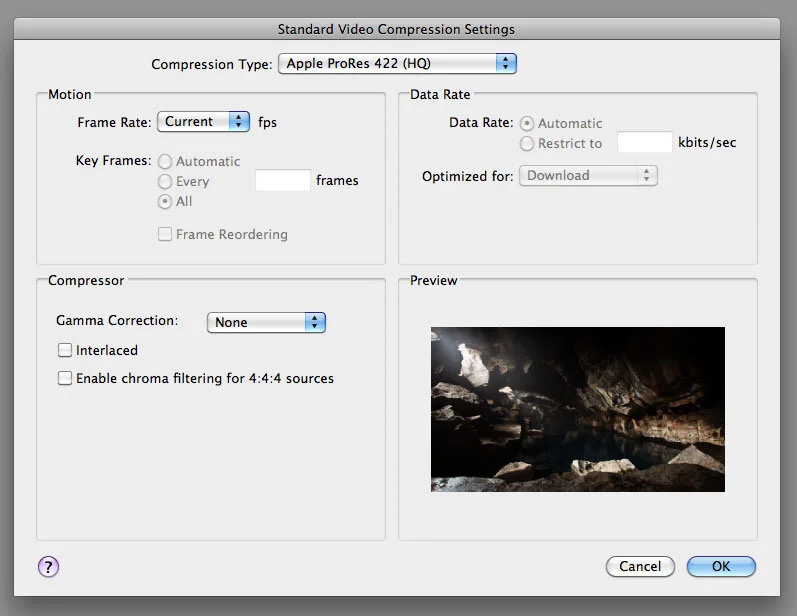
In most cases, the purpose of the clips is to be part of a project in a non-linear editing software, like Final Cut or Adobe Premiere. In these cases, you need the highest quality and also a native codec. The most popular one is the Apple ProRes, which has a great balance between quality and file size. For my productions I use Apple ProRes HQ, 4:2:2 10bits without gamma correction. The more convenient resolution is FullHD or 1920×1080.
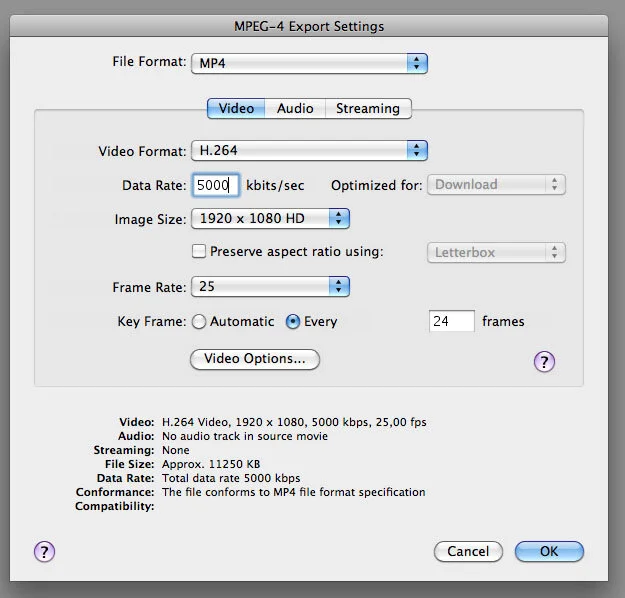
Perhaps your clip will go straight to the internet, in this case it is best to export it to a reading codec. The most popular is the H264, but if you are hosted on Vimeo, I recommend using the following image settings.
I hope that with this tutorial I have helped you with your first steps in the world of time-lapse. If there are any questions, here’s my email: info@enriquepacheco.com